I took into consideration everyone's comments from the last critique. I was open to about anything, so I researched my options. There were comments about making the wood look more real by changing paper or actually transferring the image onto a wood panel. I researched homemade paper and realized that I didn't like the way that looked. It didn't look, for lack of a better word, "biblical" enough. I went on to research what kinds of paper was used back during biblical times. This came down to papyrus or parchment. Papyrus had a cool look to it, but was more on the expensive side to make or buy. I then researched parchment, which could easily be just as expensive to buy at parchment. I then thought, how could I get this parchment look at a cheap price? I did a quick Google search on how to age paper, and it seemed like the way to go. I took the following instructions (Tea Staining) and put my own little spin on it. The process on how I aged my paper.
2. I set the oven to 250 degrees, crinkled the paper, then smoothed it out onto a cookie sheet. I didn't want it to lay flat all the way because there would have been no texture created from the tea staining.
3. I then poured the dandelion/peppermint tea mixture onto the paper, making sure everything was coated and had sunk through to the other side. I baked this for 5 min.
4. After 5 minutes, I poured the excess liquid back into the cup and put the cookie sheet back into the oven until the edges of the paper started to curl up. This stage dried out the paper.
5. Once the paper was dried, I dabbed the regular tea bag onto the paper. I wanted the tea to soak through the paper, but didn't want as much as the first tea. Back into the oven it goes until the edges of the paper curls up again.
**I repeated this step twice to make it even darker
Here's the finished project for staining the paper.
Next step is to frame these 4 pieces of paper then this project will be finished.
Smoker Website.
Over break I was also able to finish the Smoker Farm website. The Smoker family already had a domain/host purchased through GoDaddy. I've never worked with GoDaddy before so right now I'm trying to figure out how to get that all set up. Here are a couple screen shots of the website.
History Page
About Page
Home Page
Enlarged photo in the Photo Gallery -- Used Lightbox widget
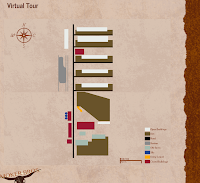
Virtual Tour -- Used Flash to make it
I think I might change the look of the photo gallery to match the rough edges of the photos like on the history and about us page. Or at least make the red borders thinner.
Contact Page -- Mail form to the email address
*Once this goes live, it will be at smokerbrothers.com
As for my next projects, I'm working on the layout for my game day program and getting my images collected for my penny project.


No comments:
Post a Comment